Matt is a Systems Development Director for a multinational franchise. Matt has lived and worked in Hawaii, Chicago, South Florida and currently resides outside of Atlanta. He enjoys his hobbies including Technology, Gadgets/EDC, Fountain Pens, Wetshaving, Clocks, Antiques & Coffee. He even roasts his own coffee weekly.
Shave of the Day 12-18-2014
Shave of the Day Dec 18, 2014
Wet Shaving – SOTD – Barrister & Mann – Lavanille
Matt is a Systems Development Director for a multinational franchise. Matt has lived and worked in Hawaii, Chicago, South Florida and currently resides outside of Atlanta. He enjoys his hobbies including Technology, Gadgets/EDC, Fountain Pens, Wetshaving, Clocks, Antiques & Coffee. He even roasts his own coffee weekly.
Introduction to Wetshaving
Many years ago, I decided that I no longer wanted to get screwed over on the soaring cost of razor blades. I started Googling things like ‘safety razors’, reading blogs, how-to’s and watching reviews. With each search on Google, I continued to put the pieces of the wetshaving puzzle together. Finally, after a few weeks, I had a decent understanding of the process and subculture that is wetshaving. If you are looking to ‘save money’ on shaving (lol!), and start enjoying the shaving experience please continue reading, I will be breaking this up into parts, as to make this all a bit more digestible…
After all that research, I knew my first step was to commit to stop buying Fusion’s/Mach’s. Instead I started investing in DE/SE (double edge and single edge) Safety Razors. Rather than spending $4+ per cartridge, I started picking up some old school DE/SE as well as straight razors (amazingly for as little as $5 each, as an aside I recently picked up three razors for .50 cents each!). And well, if you know me, you know I like to collect things… so after awhile, I had a nice little vintage razor collection.
The cool thing about old school wetshaving is that – it’s sort of like baking. Yup, baking. There are all these really cool ingredients, and when put together artfully, the end result can be outstanding. Mix the proportions up together and the experience can be, ‘meh’.
So, what else does on need to get into wetshaving you ask? Well, it’s pretty simple really.
Wetshaving Ingredients:
- Razors – These can be DE/SE/Straights.
- Blades – Double sided or single sided blades.
- Shaving Soap / Cream / Sticks – These provide lubrication, cushioning and my favorite — scent!
- Shaving Brush – This is used to whip up lather.
- Shaving Bowl / Mug / Scuttle – The vessels in which the soap / cream is added and whipped.
- After Shave – Soothing protectant for the skin.
You will need some combination of the above to wetshave. Note that some of those items can be considered optional. For example: you could face / hand lather in lieu of using a shaving brush and bowl. In all honesty, this could be pretty inexpensive, assuming you are not a hoarder/collector like me.
Example:
- Vintage Gillette Super Speed razor – $10+
- 100 blades $15+ (each blade lasts me 1-2 weeks)
- An Arko shaving stick: $3, cheap, longlasting & works great! No need for a brush or a bowl with Arko.
- $5+ for your favorite aftershave.
I am sure you get the idea; back to the analogy…
Different blades work better in certain razors, certain soaps/creams work better with specific blades. Experimenting, is in my opinion, the single best aspect of wetshaving. The plethora of options available, open you up to so many different experiences.
Throughout the years, I talked to various friends, convincing them to give wetshaving a try. Often times, I would gift them a razor, some blades and a soap/cream to get them up and running. That being said, my razor collection has grown and shrunk as I gave away, bought, traded or sold razors. At my high point, I had 20+ DE razors, which in my opinion is a decent collection. Currently, my shaving den (think wetshaving storage area), is pretty well equipped, I have enough soaps, blades, after shaves and razors to survive the shaving apocalypse… yup, apocalypse… trust me, it’s coming and you best be prepared. 😉
Case in point, I have not bought any razor blades in about three years, and I have enough to probably get me through another five years or so. I can probably say the same about soaps/creams and aftershaves. Yep, I am a bit of a hoarder when it comes to shaving accoutrement. 🙂
Stay tuned for Part II….
Matt is a Systems Development Director for a multinational franchise. Matt has lived and worked in Hawaii, Chicago, South Florida and currently resides outside of Atlanta. He enjoys his hobbies including Technology, Gadgets/EDC, Fountain Pens, Wetshaving, Clocks, Antiques & Coffee. He even roasts his own coffee weekly.
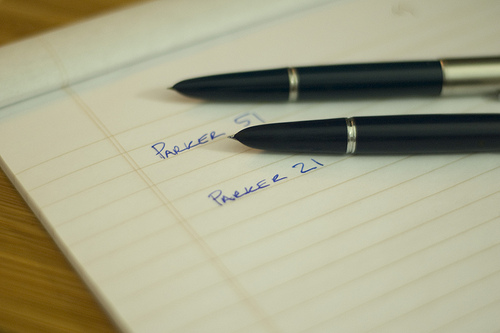
Newly Used Parker 21 Special & Parker 51 Aerometric
I recently started collecting fountain pens, I suppose my shaving gear was just not enough. I have to admit, I am really digging the whole fountain pen deal. In fast I equate both Fountain Pens and Wetshaving in the same realm of thought. I find it a passionate pleasure that admittedly is not for everyone.
So after a month or so of reading about fountain pens. I have recently acquired two vintage Parker fountain pens. A Parker 21 Special and a Parker 51 Aerometric.


There was a very kind gentleman in NYC that no longer needed these two beauties and PIF’d them to me. I still can’t believe he was so generous. The nib on the Parker 21 Special needs a tiny bit of tuning. The Parker 51 nib could use replacing. Its a little worn. Not too bad, but since I am sending in the 21 for some repairs Ill shoot the 51 over as well.
Last night, I decided to work out as many of the scratches as I could. There were a bunch of scratches on the 21. If you didn’t know the 21 was made with a different type of plastic than the 51. So, the 21 is prone to scratching.
Here are a few shots of the Parkers before I worked them over last night.
Parker 51 Before:
Parker 21 Before:
So, here is how I refinished the pens. I used 1000 / 1500 / 2000 grit wet sandpaper. I slowly worked each section from 1000 up. I kept the sandpaper wet and let the slurry do the work. Very little pressure was applied and I made sure not to stray in one spot for too long. Once I made it to 2000 I switched over to Novus #2 plastic scratch remover and polish. I hand buffed each piece till there was a nice shine.
Here are some after shots…
Parker 51 After:


Parker 21 After:


Next up for this week, I am sending the pens off to get tuned up. Hopefully, it doesn’t take too long to get them back. I am already falling in love with these pens and they still aren’t in perfect working order yet.
After I get the Parkers back I will probably be giving them the once over with some 8000 / 10000 / 12000 micro-mesh. That should really improve the luster even more so. Ill make certain to keep you all updated.
Matt is a Systems Development Director for a multinational franchise. Matt has lived and worked in Hawaii, Chicago, South Florida and currently resides outside of Atlanta. He enjoys his hobbies including Technology, Gadgets/EDC, Fountain Pens, Wetshaving, Clocks, Antiques & Coffee. He even roasts his own coffee weekly.
How To Properly Prepare A Fountain Pen For Inking
This week I started playing around with fountain pens. They truly are fascinating, I find them very much like vintage shaving gear. Highly enjoyable.
Anyway, here is a little video I made the yesterday. It explains How To Properly Prepare A Fountain Pen For Inking.
Matt is a Systems Development Director for a multinational franchise. Matt has lived and worked in Hawaii, Chicago, South Florida and currently resides outside of Atlanta. He enjoys his hobbies including Technology, Gadgets/EDC, Fountain Pens, Wetshaving, Clocks, Antiques & Coffee. He even roasts his own coffee weekly.
- « Previous Page
- 1
- …
- 3
- 4
- 5
- 6
- Next Page »